 Introduction
 Archive
 Projects
 Gallery Blocks
 Social Feeds
 Proofing
 Saved Layouts and Shortcodes
 Settings
 FAQ
FAQ Troubleshooting
 Developers
Table of Contents
Congratulations on signing up for Visual Portfolio Pro. This guide walks you through the entire process of installing and activating Visual Portfolio Pro on your WordPress site.
Download from Email
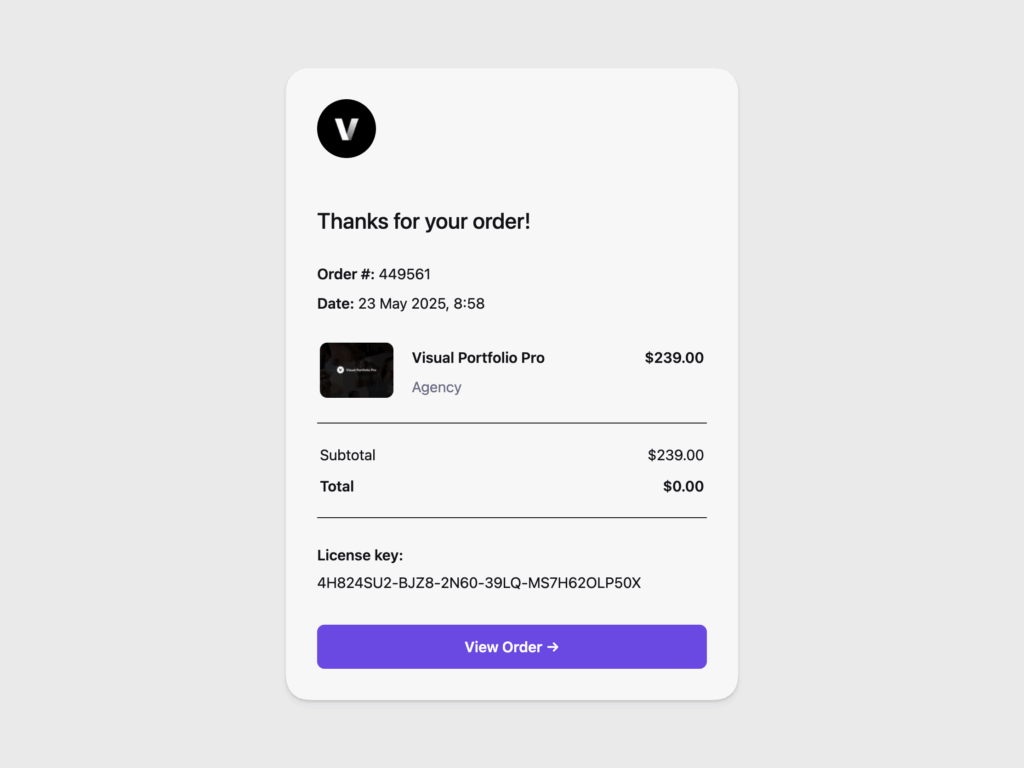
Once you’ve purchased the Visual Portfolio Pro plugin, you will receive the full information about this purchase to your email. There will be a license key and a link to your order page.
Just click on the order page link to download the plugin archive. In case if you can’t download it, follow the next step.
Download from Account
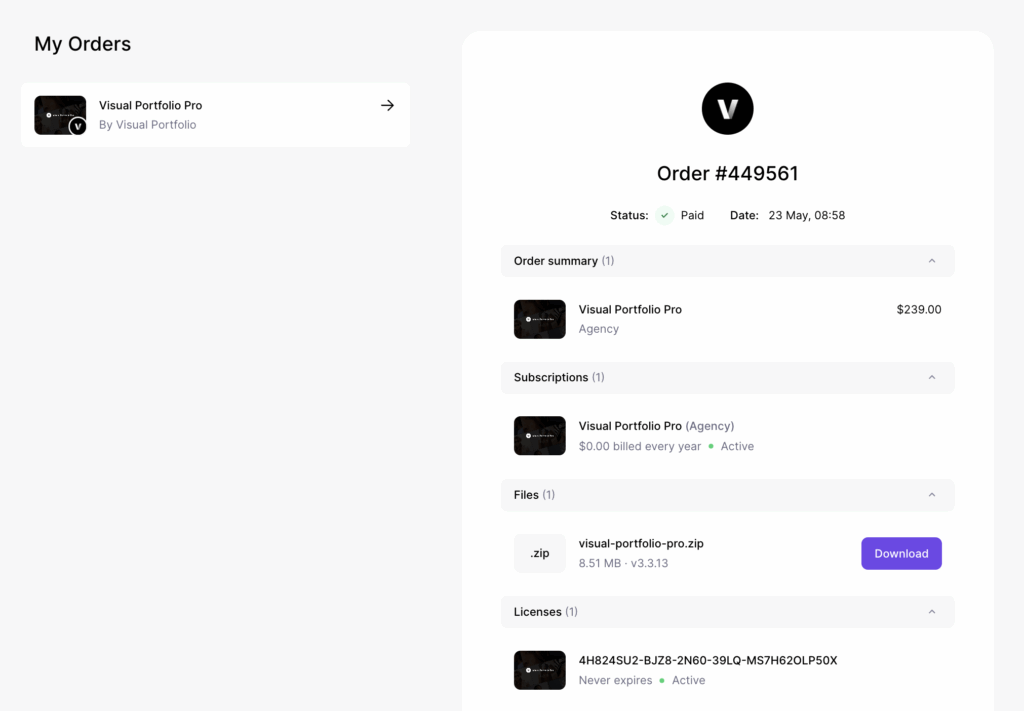
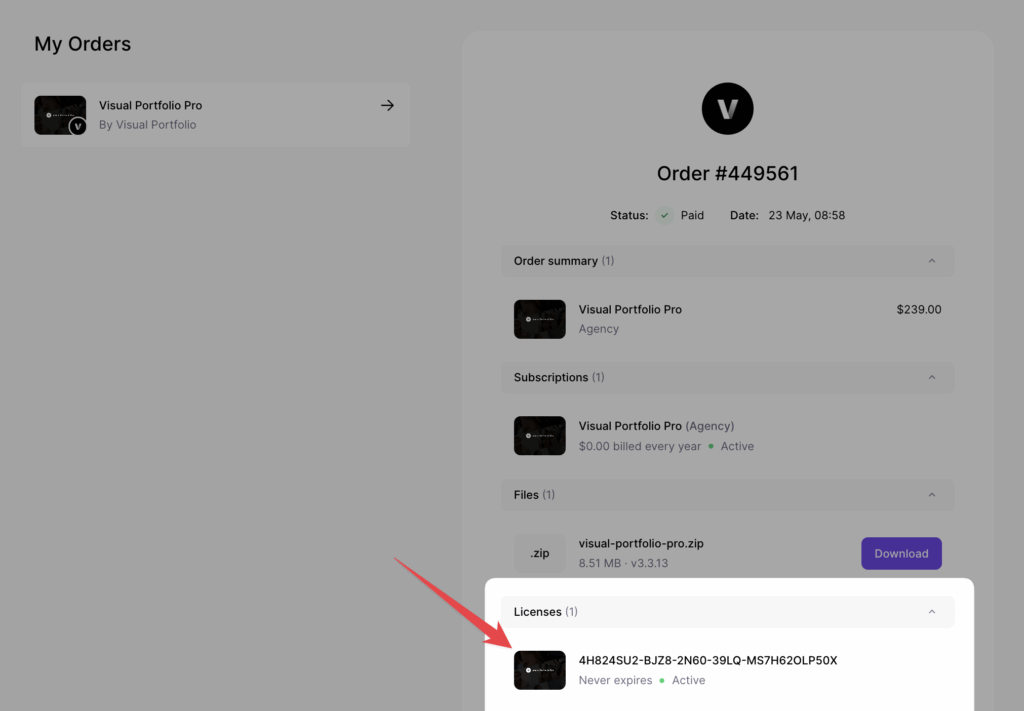
- After purchasing Visual Portfolio Pro, go to your Lemon Squeezy orders
- Once logged in, you will see all your orders. Select the Visual Portfolio Pro order page.
- On the right side you will see files to download and license key
Install
- Head over to your site, to the WordPress dashboard
- Open Admin Menu → Plugins and click on the Add New button
- Choose the zip file you have just downloaded. Click on install and activate
Activate
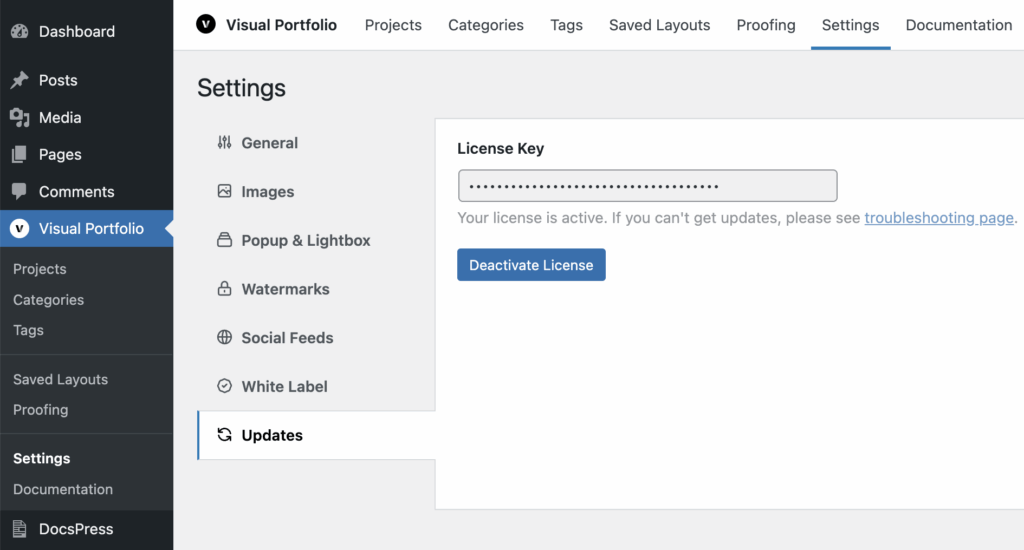
In order to receive automatic updates of the Pro plugin, you need to activate your license:
- After installing the Visual Portfolio Pro, go to your Lemon Squeezy orders
- Select the Visual Portfolio Pro order page.
- Copy the license key
- Head over to your site, to the WordPress dashboard, and click on Admin Menu → Visual Portfolio → Settings → Updates
- Insert your license key and push the Activate License button
Legacy Paddle + nkdev.info
Previously we used Paddle with nkdev.info to make purchases and generate licenses. There are still a lot of users which use the plugin and license from this method, so sections below will be helpful for them.
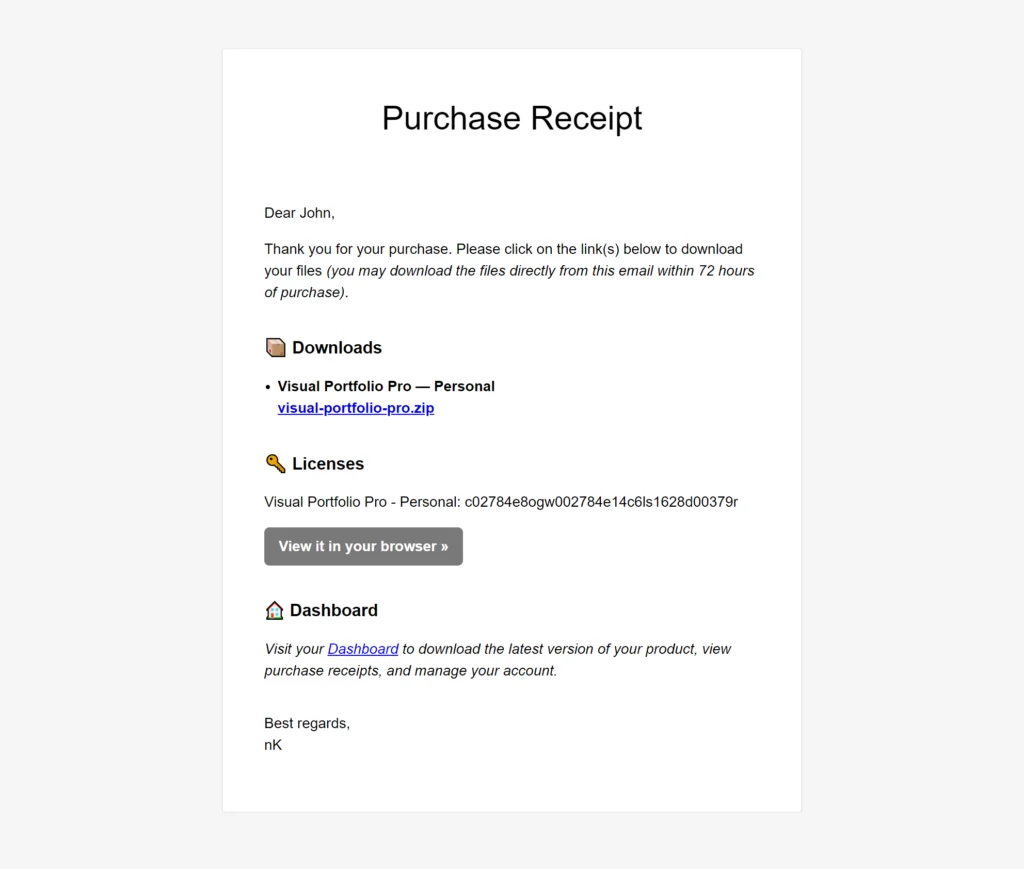
Download from Email
After your purchase, you will receive an email containing:
- A download link for the plugin (valid for 72 hours)
- Your license key
- A link to your account page
Click the download link in the email to get the plugin archive. If the download link isn’t working, follow the steps below to download from your account.
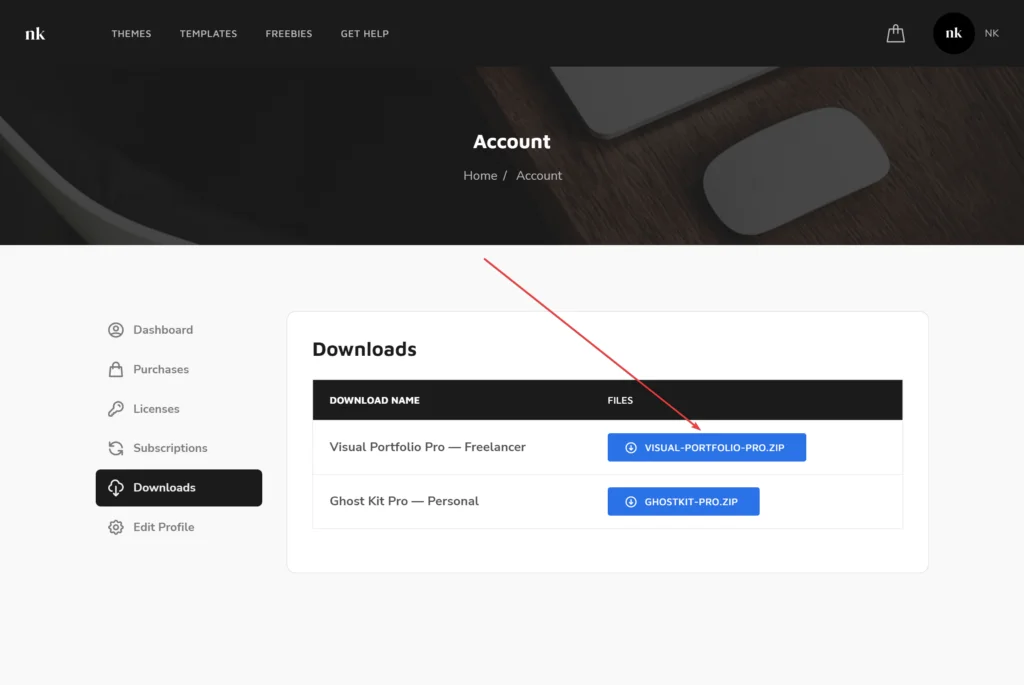
Download from Your Account
- Visit the account dashboard.
- Enter the login details received in the email after your purchase.
- Navigate to the Downloads section on the left side of the account dashboard.
- Click the download button to save the `.zip` file to your desktop.
Installing the Pro Plugin
- Go to your WordPress admin dashboard.
- Navigate to Admin Menu → Plugins → Add New
- Click on the Upload Plugin button at the top of the page
- Choose the zip file you have just downloaded
- Click Install Now
- After installation is complete, click Activate
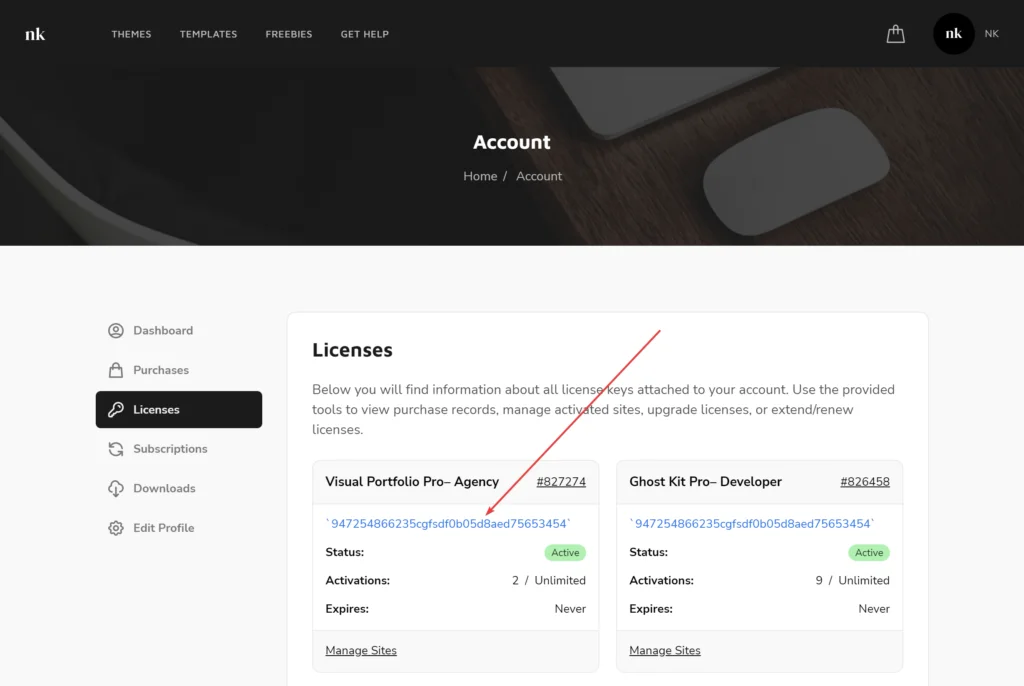
Getting Your License Key
For automatic updates, you’ll need to activate your license.
- Go to the account dashboard.
- Click on the Licenses section
- Copy your license key
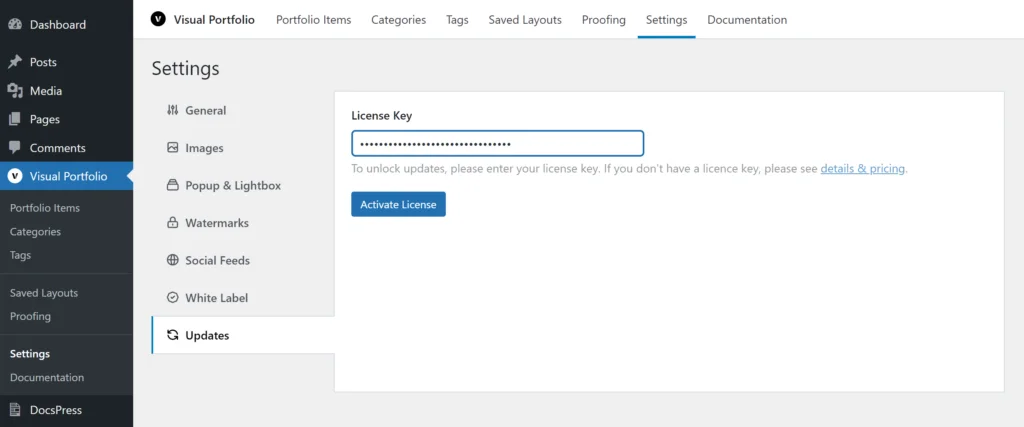
Activating Your License
- In your WordPress dashboard, go to Visual Portfolio → Settings → Updates
- Paste your license key into the provided field
- Click Activate License
Activation on Multisite Networks
If you are using Visual Portfolio Pro on a WordPress multisite network:
- Activate your license on the primary site of the network only
- There is no need to activate the license on each subsite